 MSP ERP
Step-by-step guide
How to book a table and track it on the restaurant floor map
When a booking comes in, the front-of-house team can assign it to a table and follow that table’s status on the floor map. MSP ERP checks for overlapping reservations when you save.
Before you start
In Floor Setup, prepare a dining area and an active table. This example uses the four-seat table DEMO-T04 for a party of three, with a 90-minute booking.
Steps to follow
Open a new reservation
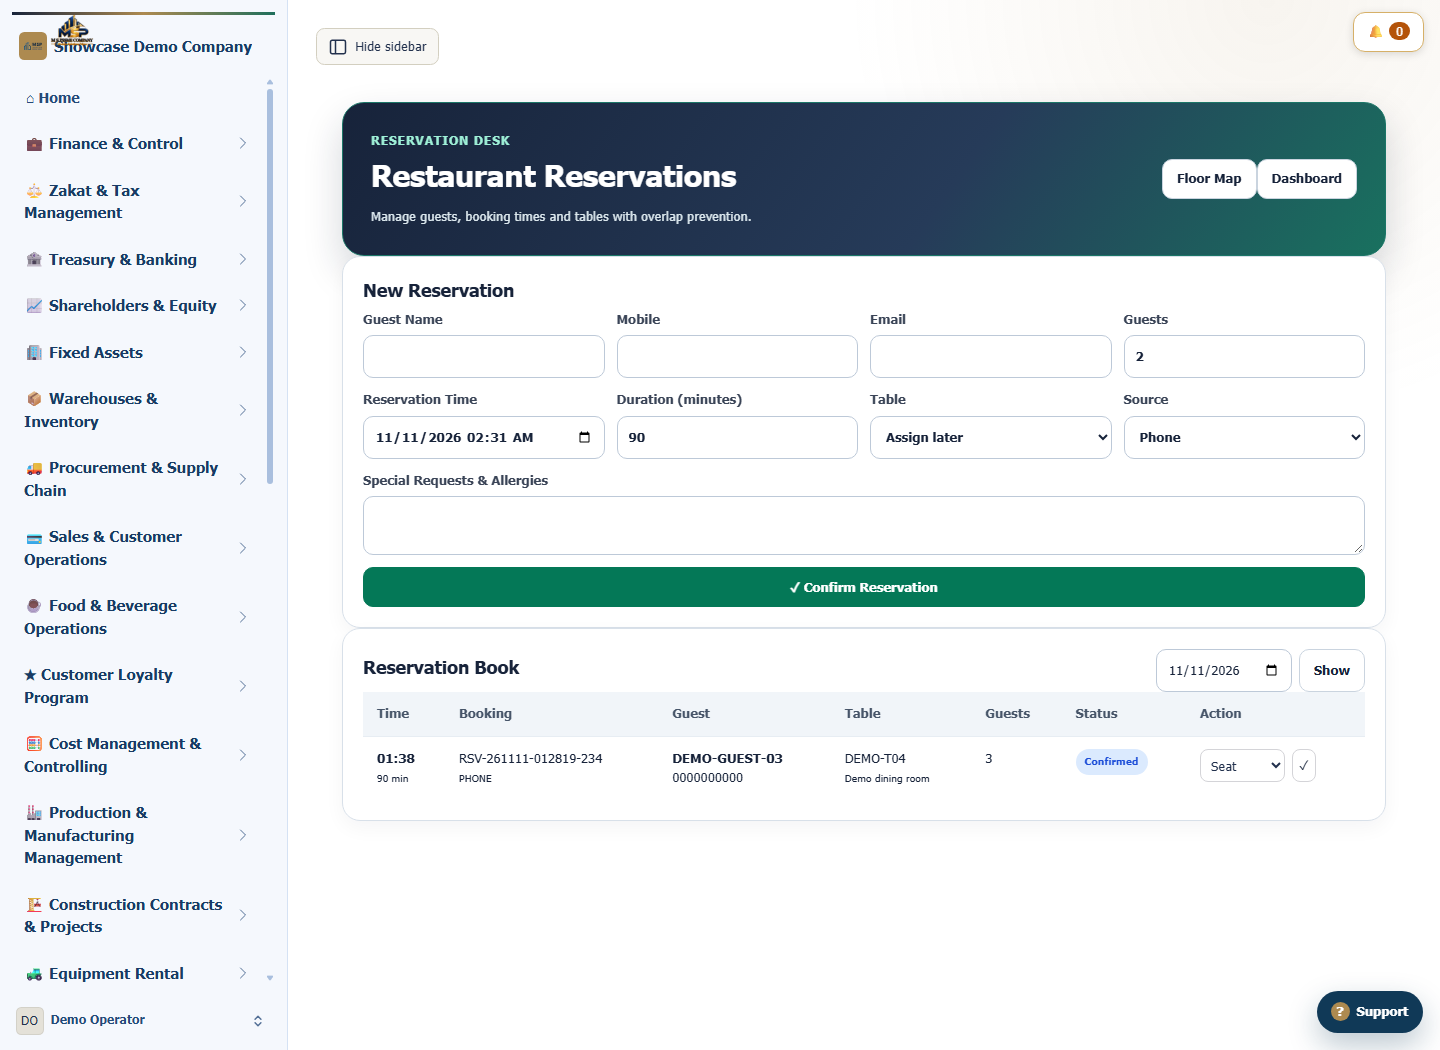
In Restaurant Reservations, go to New Reservation. Enter the guest name, mobile number and party size. The example uses the fictional guest name DEMO-GUEST-03.
Set the time and table
Enter the reservation time and duration, select DEMO-T04, and choose Phone as the source. Check that the table seats the whole party.
Save and check the confirmation
Select Confirm Reservation and find the booking in the Reservation Book for that day. Match the time, table and party size, and check that the status is Confirmed.
Check the map as the booking approaches
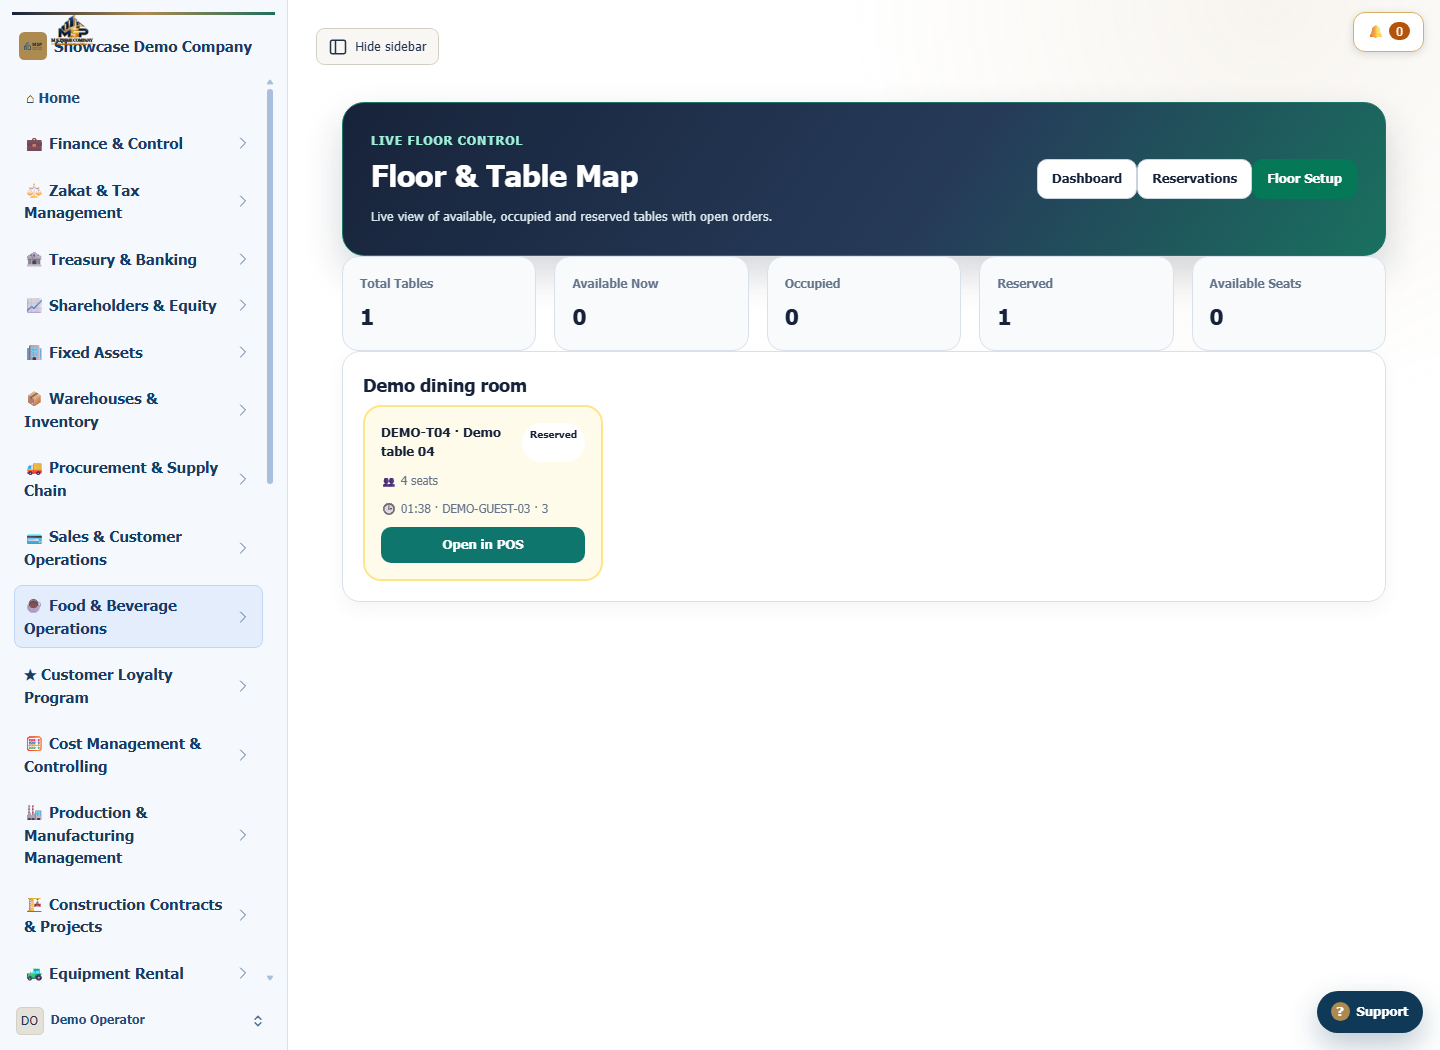
Open Floor Map. Ten minutes before this demo booking, DEMO-T04 shows as Reserved so the team can see that it has been set aside.
What to check
Match the table and time in the reservation register to the floor map as the booking approaches. If the system detects an overlap, choose another time or an available table.