 MSP ERP
Step-by-step guide
Delivery app guide from storefront setup to order delivery
Set up a storefront for your company and follow an order from the customer to the approver and delivery driver. The walkthrough uses a demo shop and one specialty coffee order.
Before you start
Prepare the branch, warehouse and items. Decide who manages the catalog, approves orders and makes deliveries. Run the first exercise with synthetic data and simulated payment. Screenshots show the Arabic demo interface. Before opening the store to customers, place a test order from a phone and check the address and delivery fee before approving it.
Steps to follow
Configure the storefront for your business
In Channels and Catalog, create an online store channel. Open the storefront settings, choose the storefront address, branch and warehouse, and set the delivery area and pre-tax fee. A retailer might start with items stocked at one branch. A restaurant might start with menu items suitable for delivery within its service area. Review the settlement account, payment mode and delivery fee item before activating the store.
Assign roles and publish the catalog
In storefront settings, assign the merchant, approver and driver roles to team members. In the merchant dashboard, open Manage Products and choose the items to offer. Set their display names, prices, categories and images, then choose which items are visible. The demo uses the in-stock specialty coffee item.
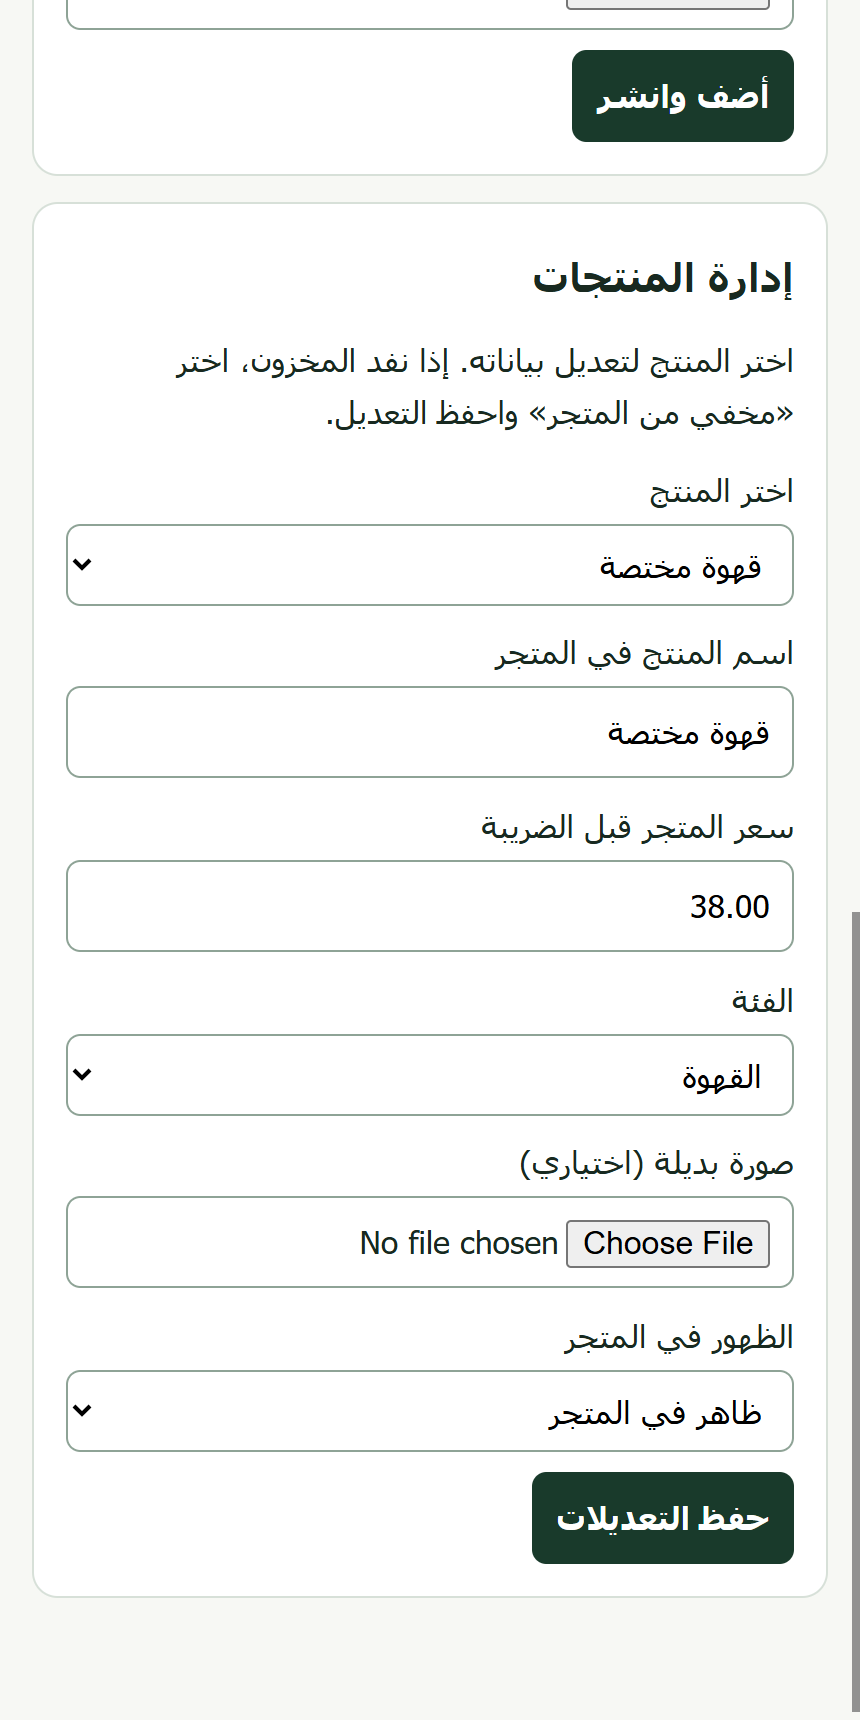
Configuring the specialty coffee listing in the demo catalog · MSP ERP screen with synthetic demo data Choose products and enter a delivery location
Open the storefront as a customer. Find Specialty Coffee and set the quantity to 1. Enter a fictional name, address and phone number, select the demo location in the preview, then choose Review Order.
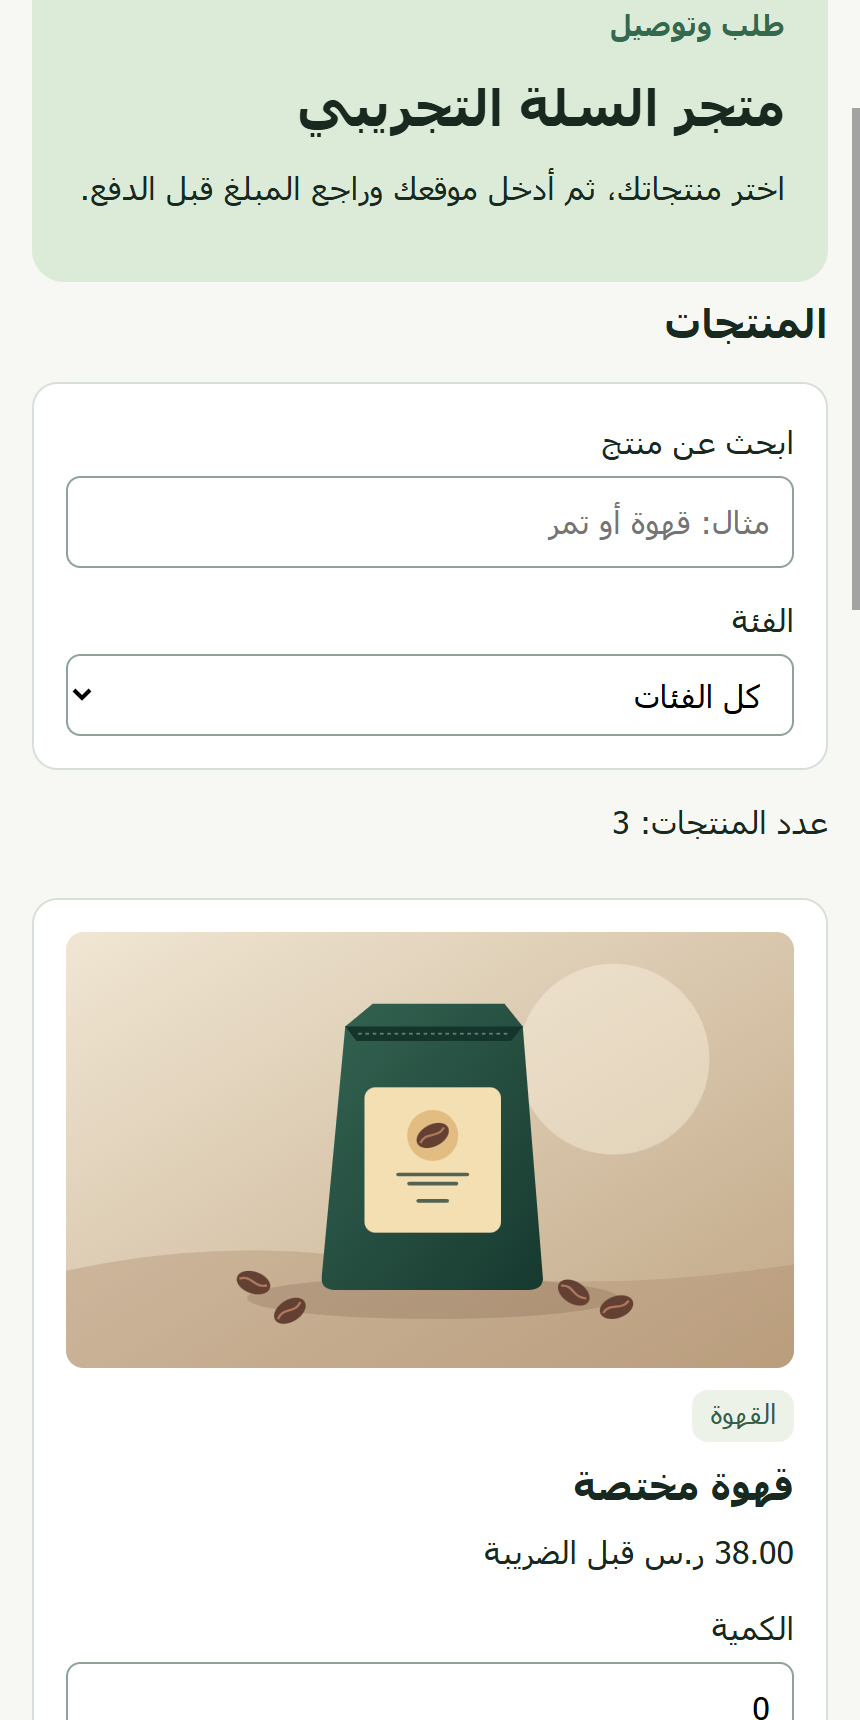
Demo storefront and product selection · MSP ERP screen with synthetic demo data Review the total and simulate payment
On the tracking page, check the item, quantity, delivery fee, tax and total. Keep the order number for reference. Select Simulate Payment in the preview and confirm the status shows that simulated payment succeeded and approval is pending.
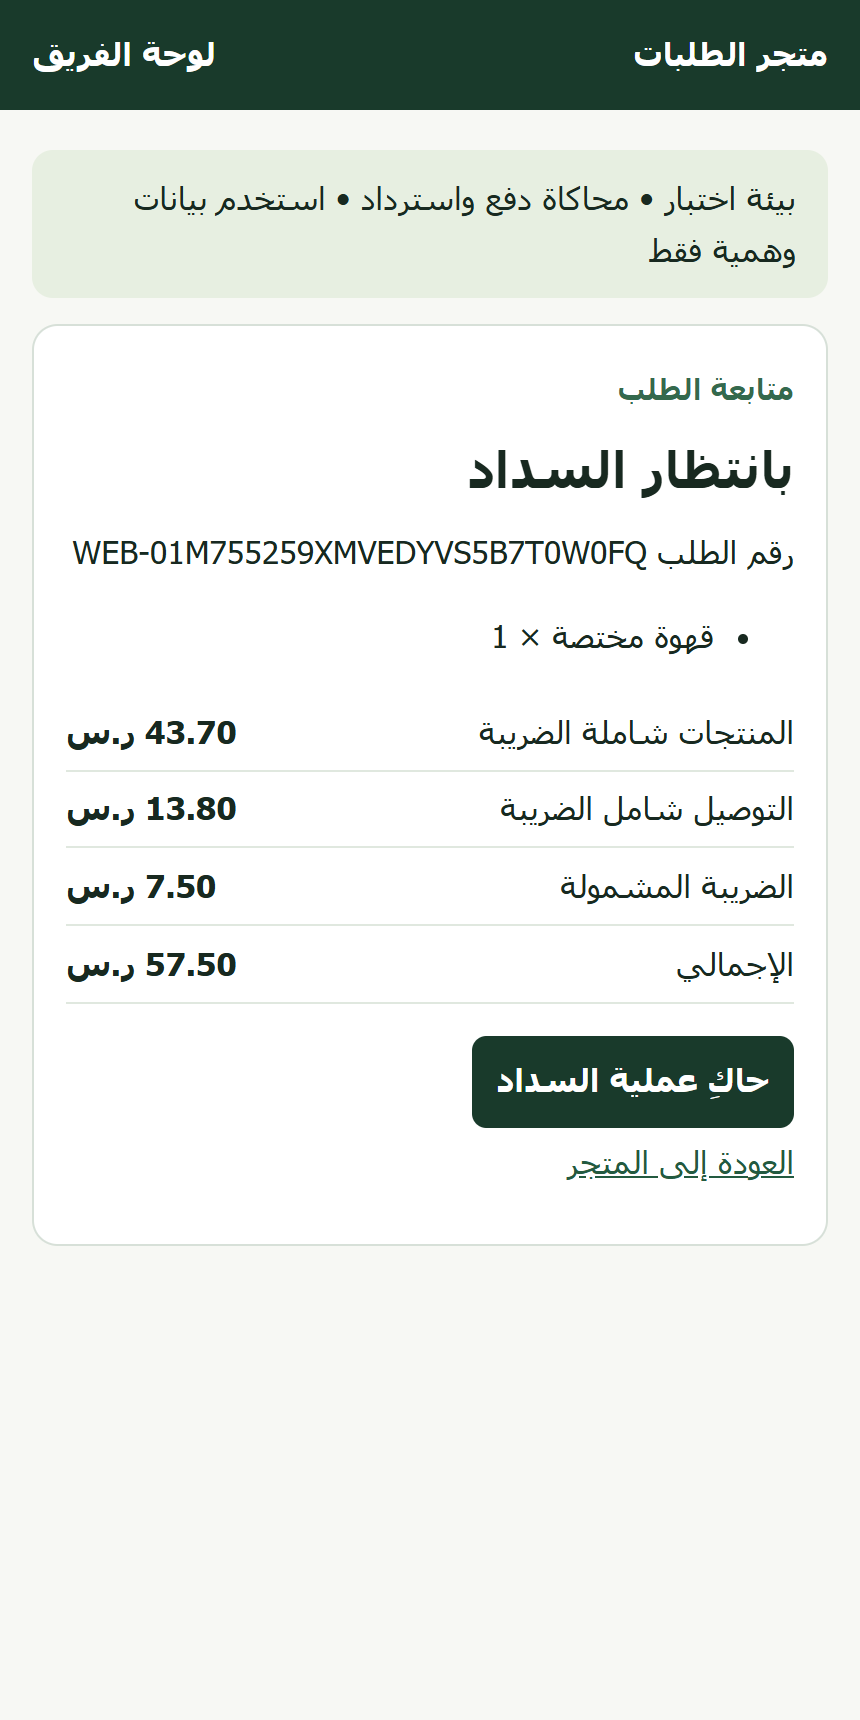
Product, delivery fee and order total before simulated payment · MSP ERP screen with synthetic demo data Approve the order and assign a driver
Open the approver dashboard and match the order number. Select a driver, then choose Approve and Post Invoice. Confirm that the order is approved and that the linked invoice appears in the team dashboard.
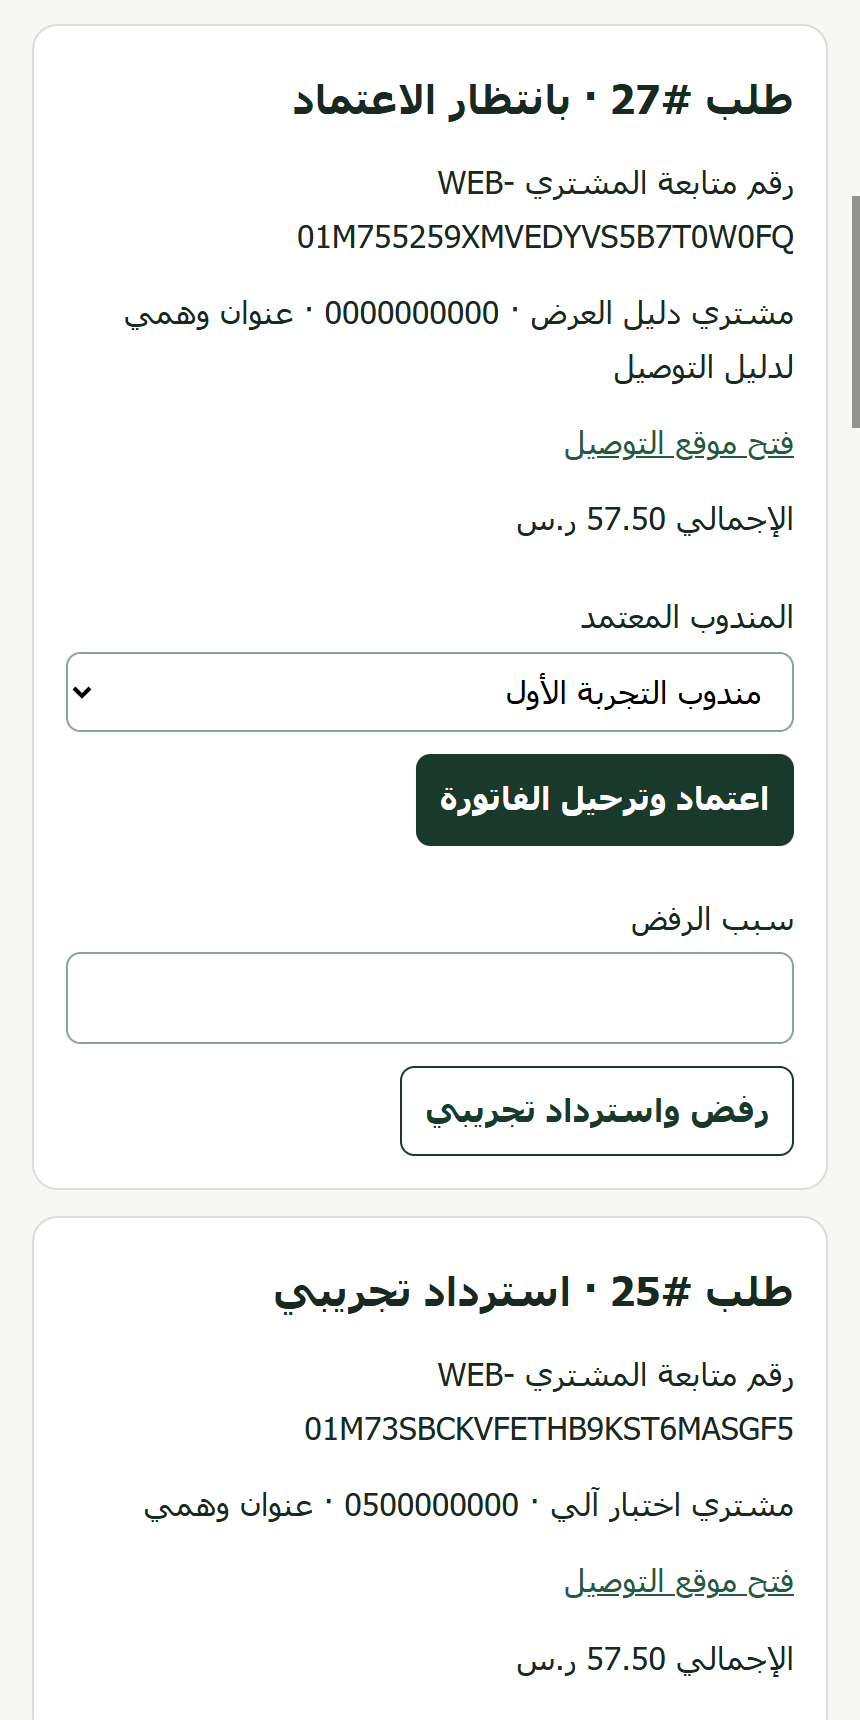
Selecting the driver for the demo order awaiting approval · MSP ERP screen with synthetic demo data Update the order through delivery
Open the assigned driver’s dashboard and find the order. Mark it as picked up, then out for delivery, and finally delivered once the handoff is complete. Reopen customer tracking and confirm that the same order number shows Delivered.
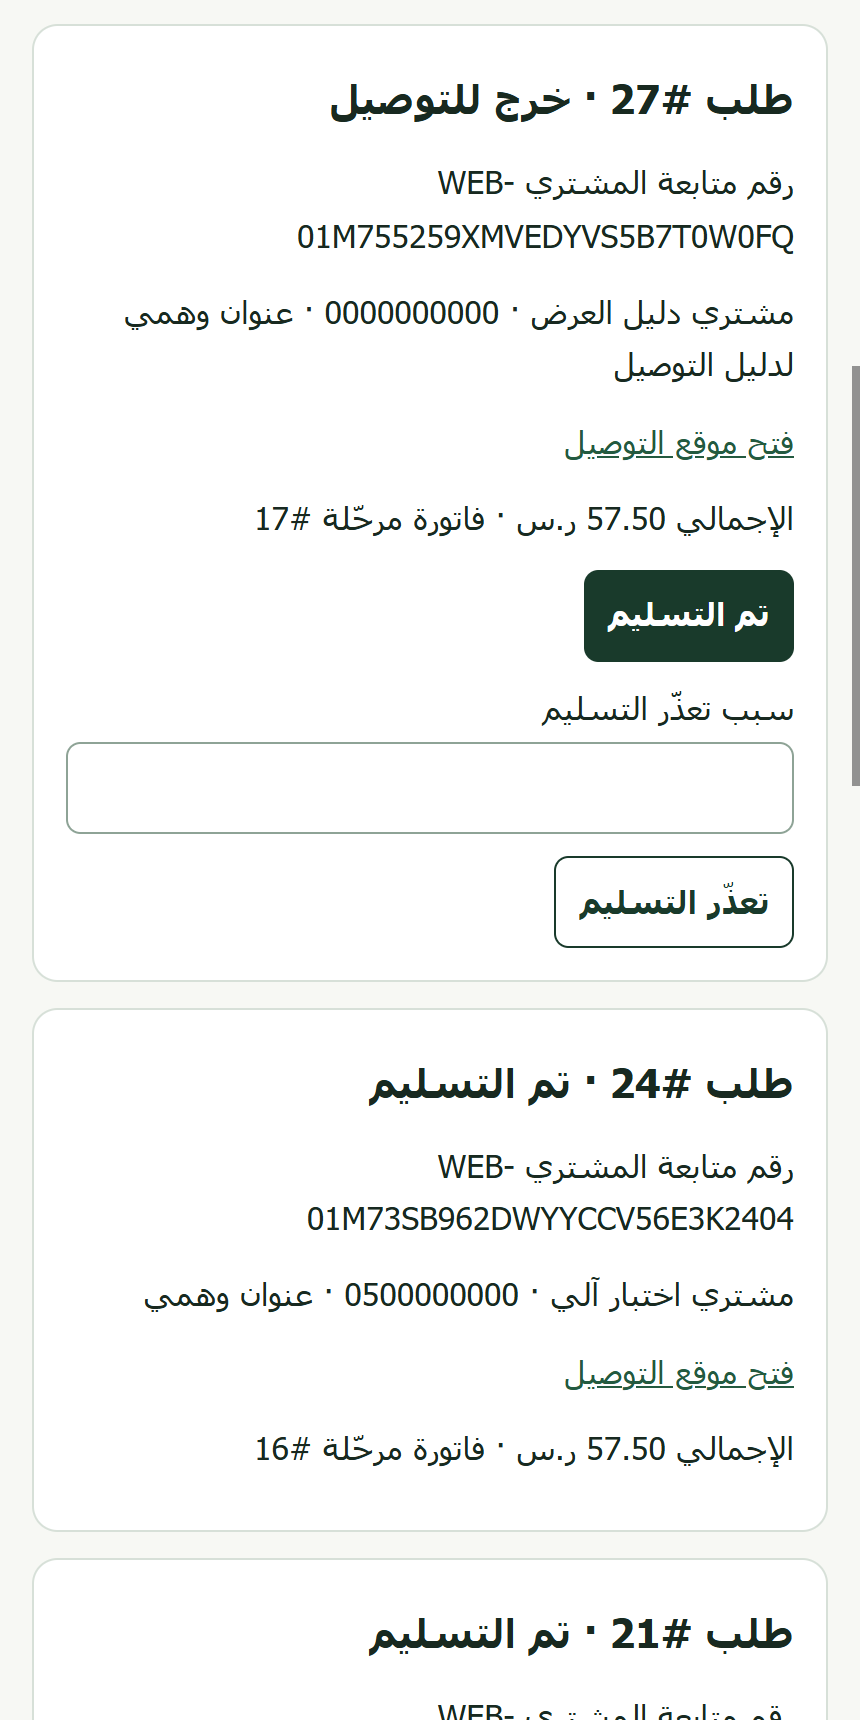
Demo order marked out for delivery in the driver dashboard · MSP ERP screen with synthetic demo data 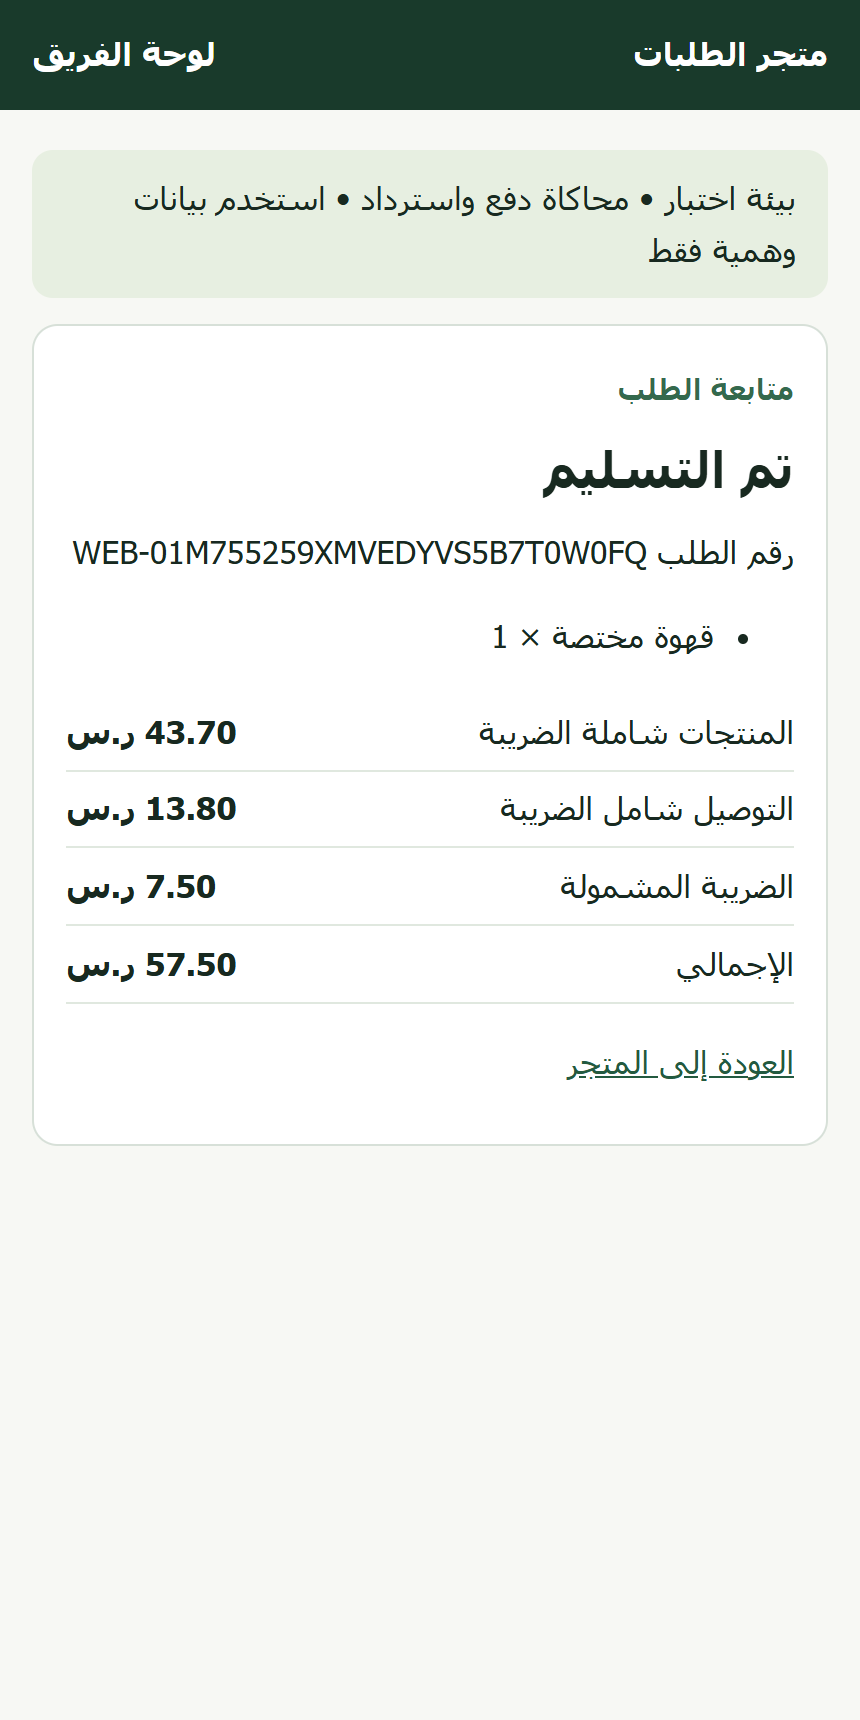
Customer tracking page showing the delivered order · MSP ERP screen with synthetic demo data
What to check
Match the order number in the storefront, approver dashboard, driver dashboard and customer tracking page. In the demo, the linked invoice appeared after approval and the customer tracking page showed Delivered.