 MSP ERP
Step-by-step guide
How to create a shipment and track it by reference
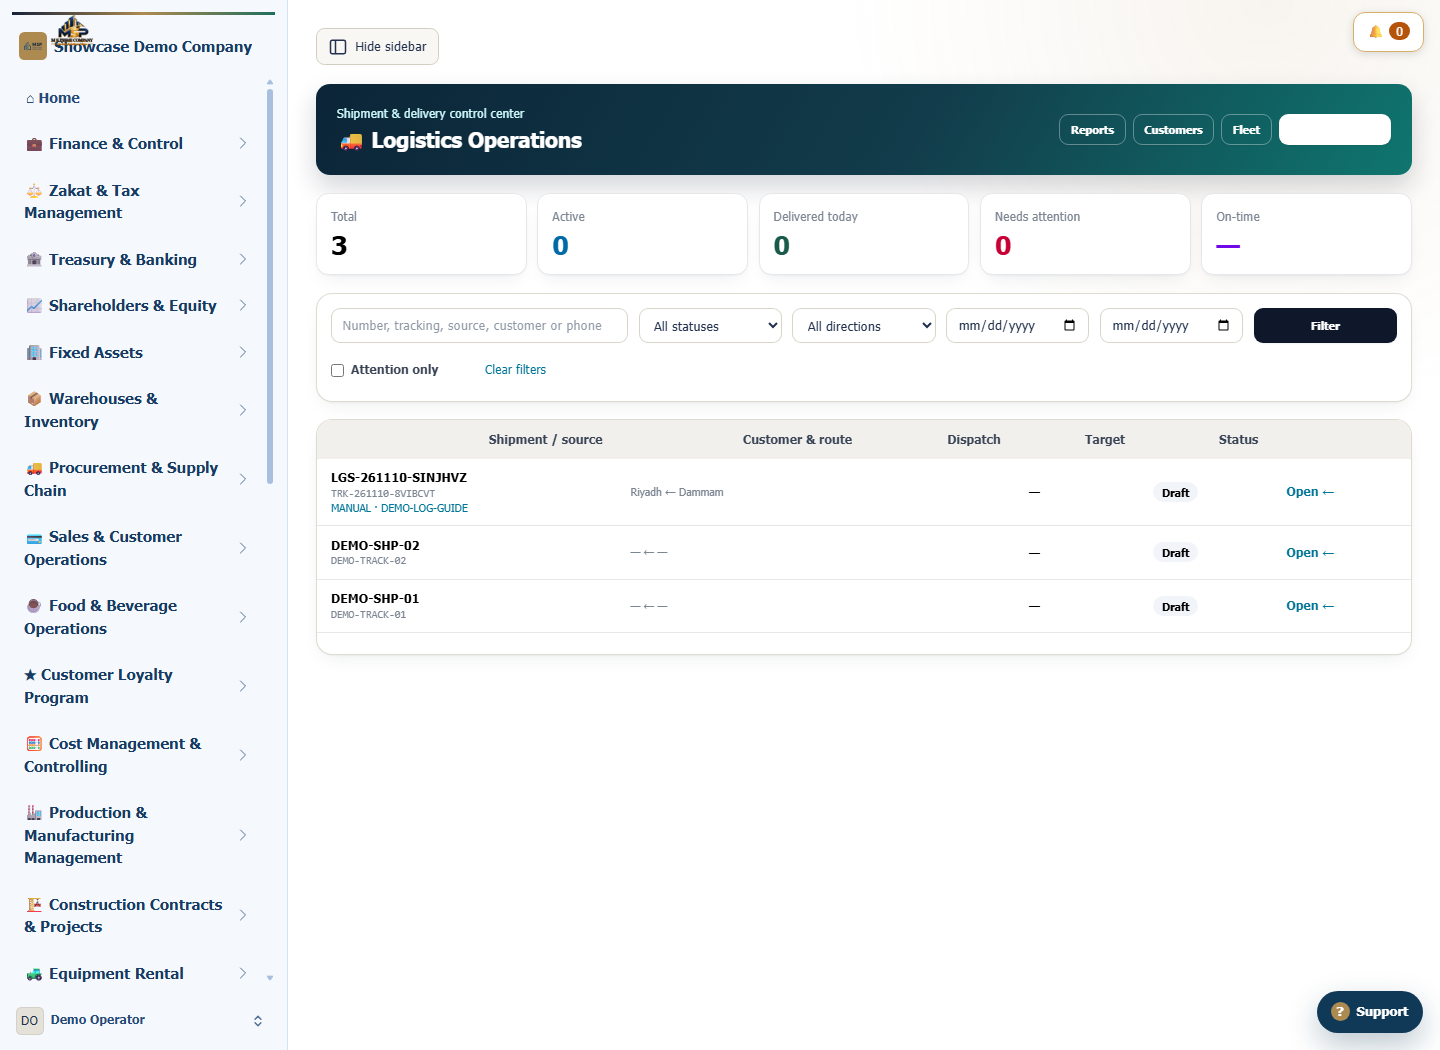
Creating a shipment gives operations one tracking number for its status, delivery schedule and source reference. The shipment list helps the team find active records and identify cases that need attention.
Before you start
Use a fictional shipment from Riyadh to Dammam with two packages weighing 12 kg in total. The demo manual reference is DEMO-LOG-GUIDE.
Steps to follow
Choose the direction and service
In Logistics, select New shipment. Choose Outbound / delivery, Standard service and Normal priority. Set Source to Manual and enter the demo reference.
Enter the route and cargo
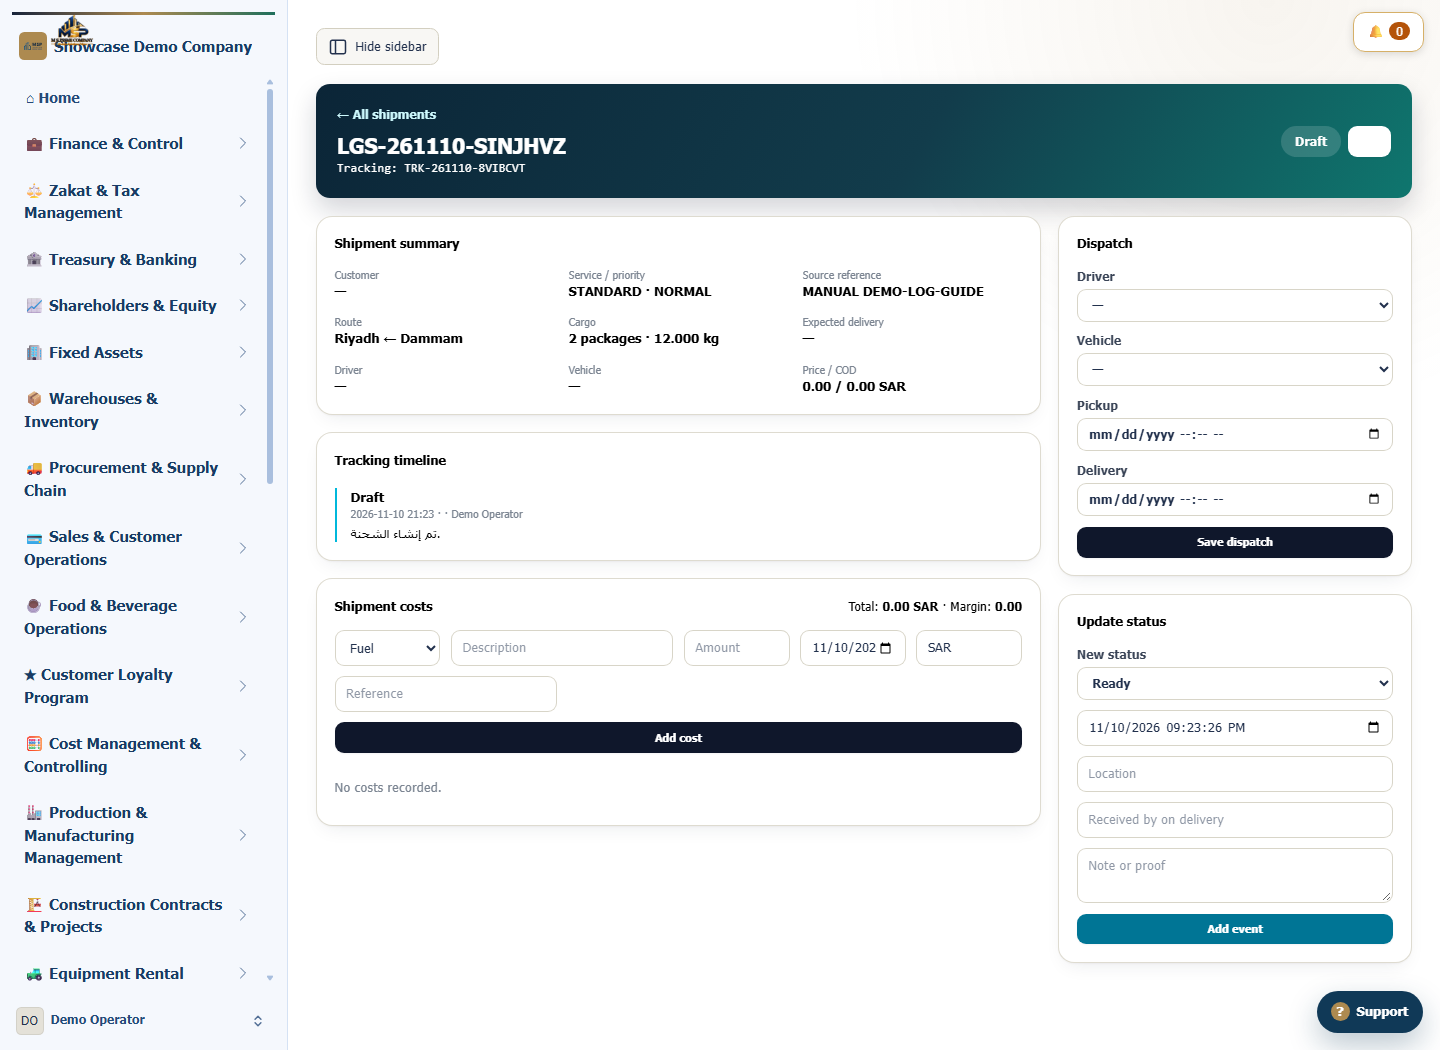
Enter Riyadh as the origin and Dammam as the destination. Record two packages with a total weight of 12 kg. Add planned pickup and expected delivery times if known.
Create the shipment and reopen it
Select Create shipment & tracking. The details show a tracking number beginning with TRK. Copy it and search the shipment list to reopen the record.
Review the shipment status and timeline
Check the draft status and creation event in Tracking timeline. When the shipment actually reaches its next stage, an authorised user records the status and time under Update status.
What to check
Match the tracking number and DEMO-LOG-GUIDE across the list and details. Check the package count and weight in the shipment details.