 MSP ERP
Step-by-step guide
How to add a branch and review its settings
Set up a new branch by recording its identity within the company. A distinct code and a clear name help users recognize it when selecting a branch in screens and reports.
Before you start
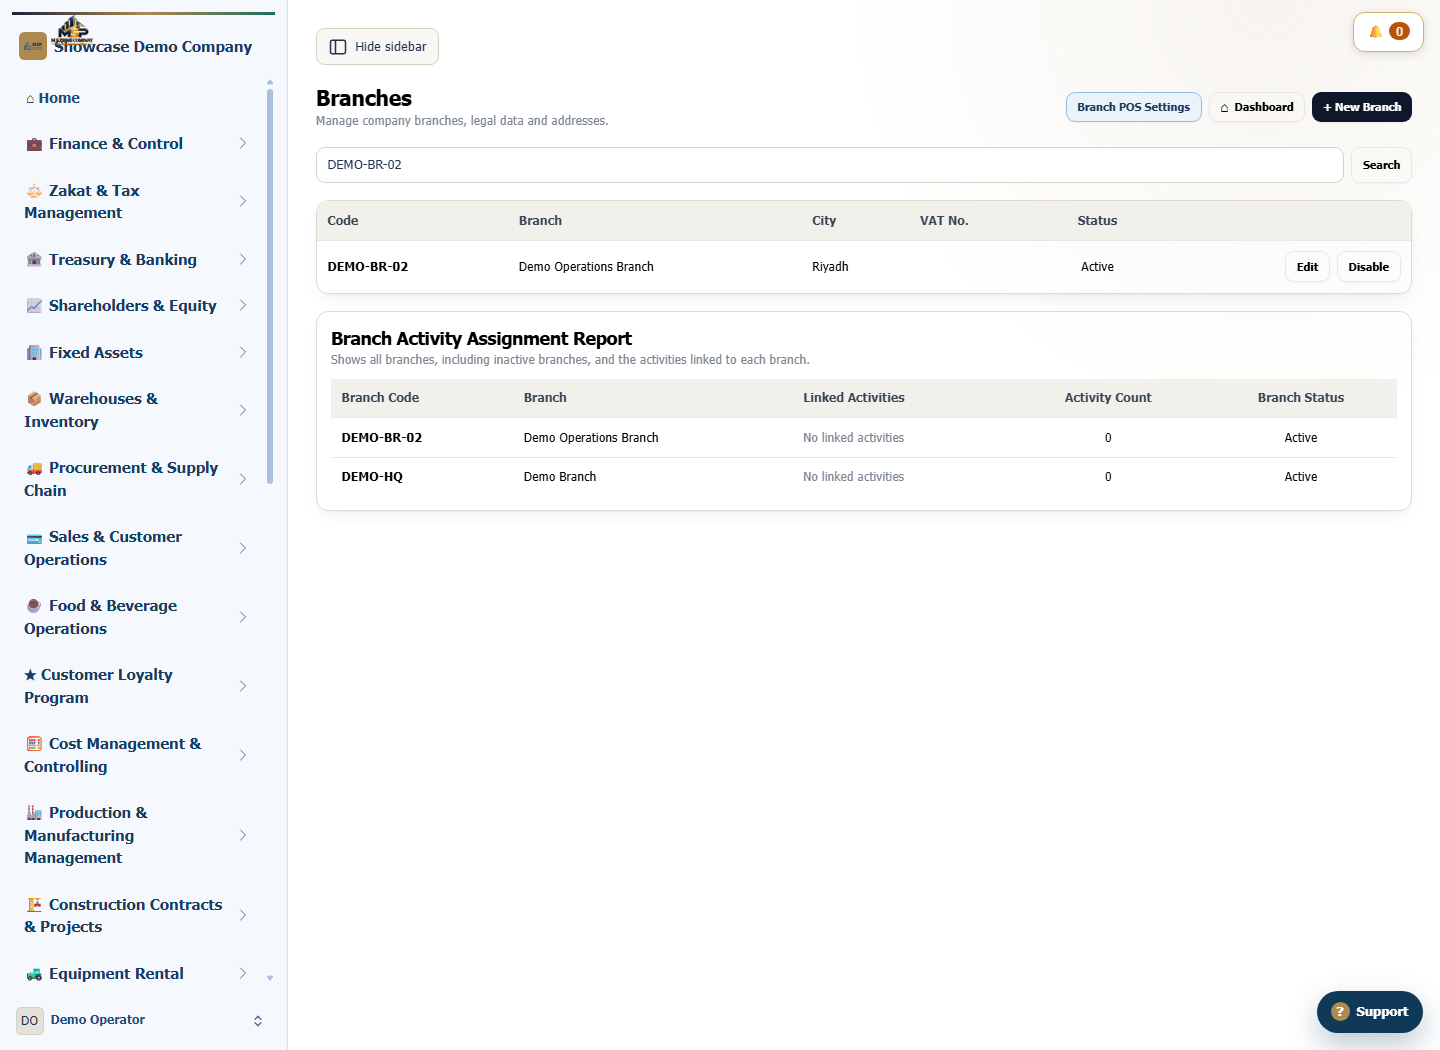
Start in the correct company with access to create branches. The example adds a fictional operations branch in Riyadh under code DEMO-BR-02.
Steps to follow
Open a new branch record
Go to Branches and select New Branch. Enter a code unique to the company, such as DEMO-BR-02.
Enter the branch details
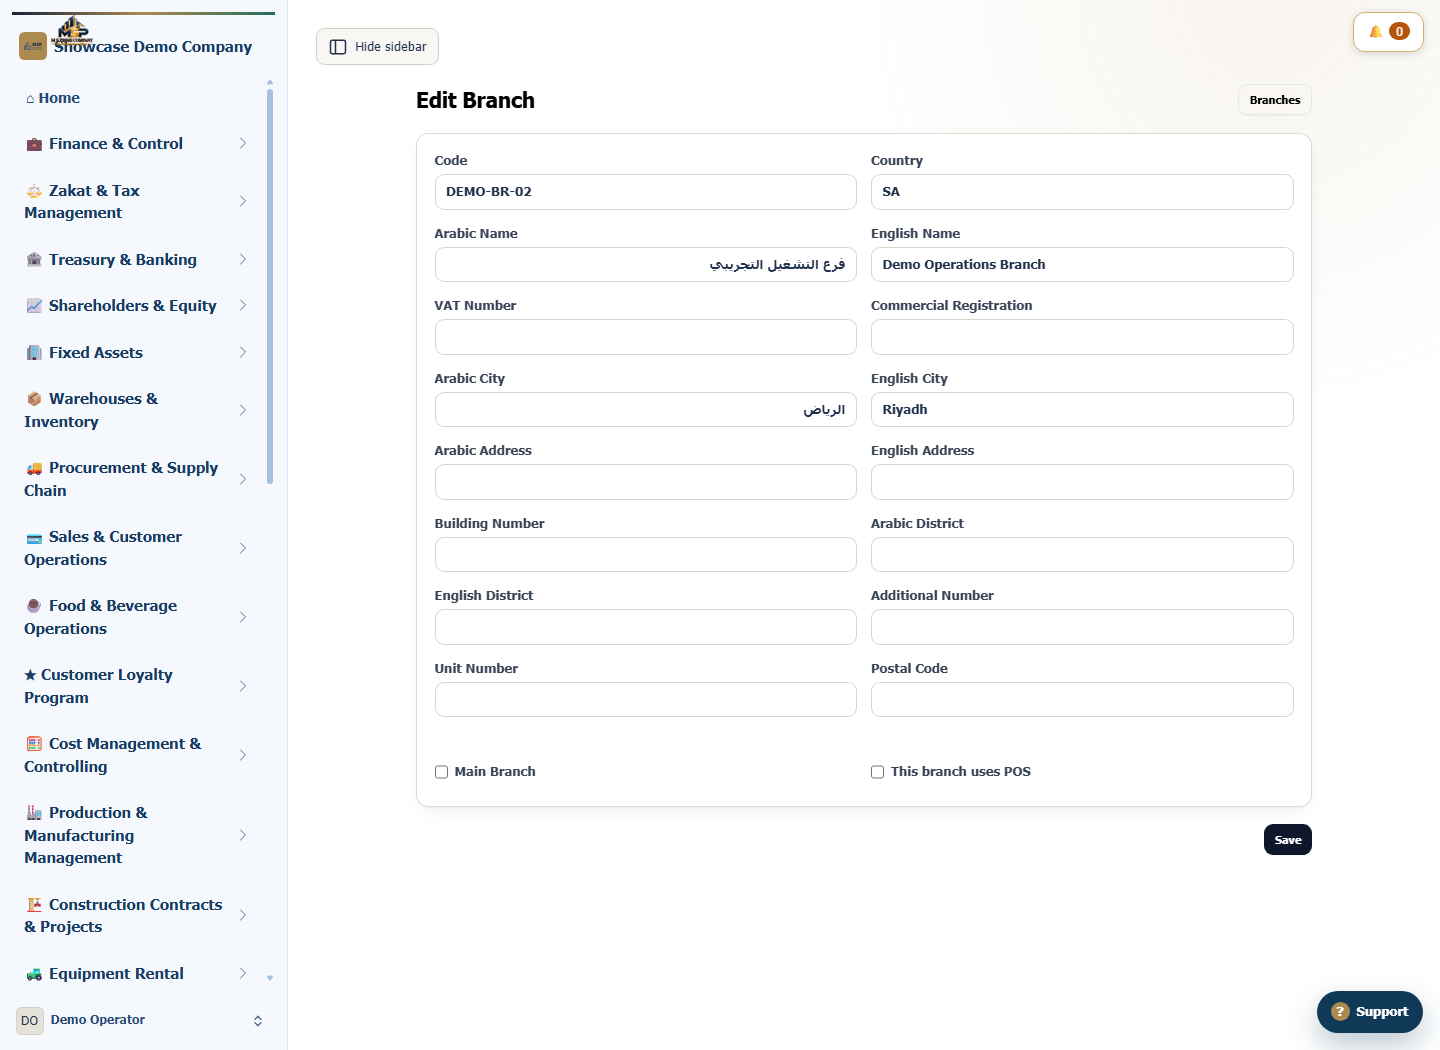
Enter the Arabic and English names, including Demo Operations Branch. Use country code SA and enter الرياض and Riyadh in the city fields.
Review operating options and save
Leave Main Branch and This branch uses POS unchecked for this example. Review the details and select Save.
Reopen the branch to confirm
Search for DEMO-BR-02 and check that its status is Active. Select Edit and confirm the saved code, name and city.
What to check
Check the main branch and the new operations branch before setting up user access. If the branch needs POS, review Branch POS Settings for how it will operate.