 MSP ERP
Step-by-step guide
How to create a unit of measure and assign it to an item
The base unit tells users what a quantity means on an item record. In this example, a quantity of 1 represents one box of labels, identified by the symbol BOX.
Before you start
The example uses unit DEMO-BOX-12 and item DEMO-LABEL-BOX. Have a suitable item type available in the current branch.
Steps to follow
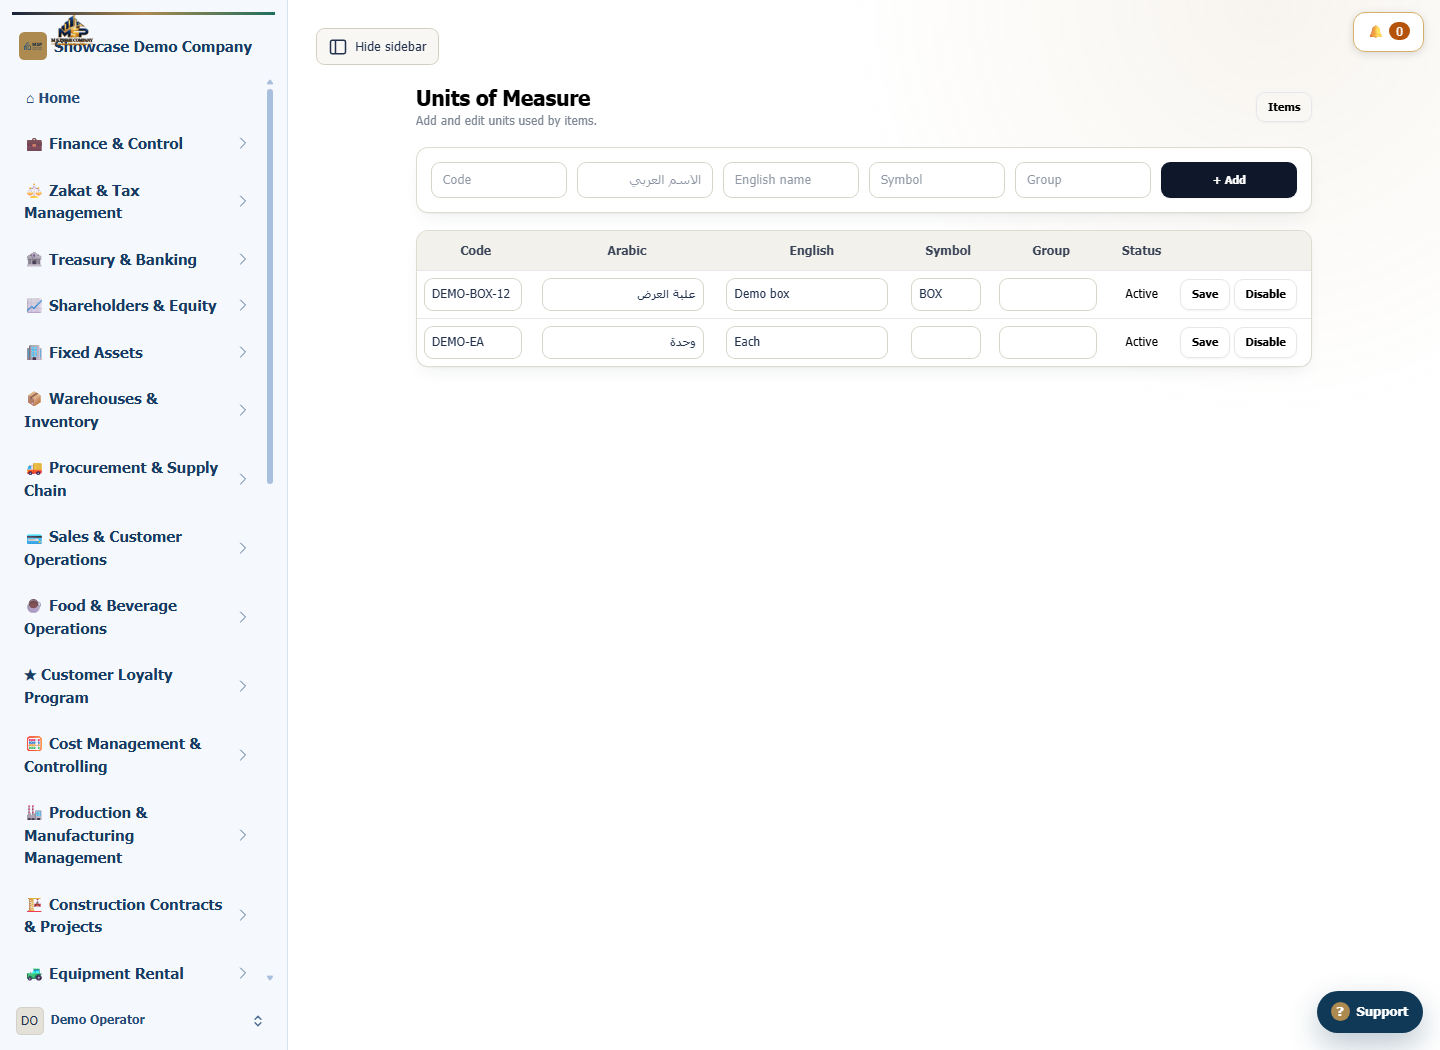
Add the unit of measure
In Units of Measure, enter DEMO-BOX-12 as the code, علبة العرض and Demo box as the names, and BOX as the symbol. Select Add.
Start the item record
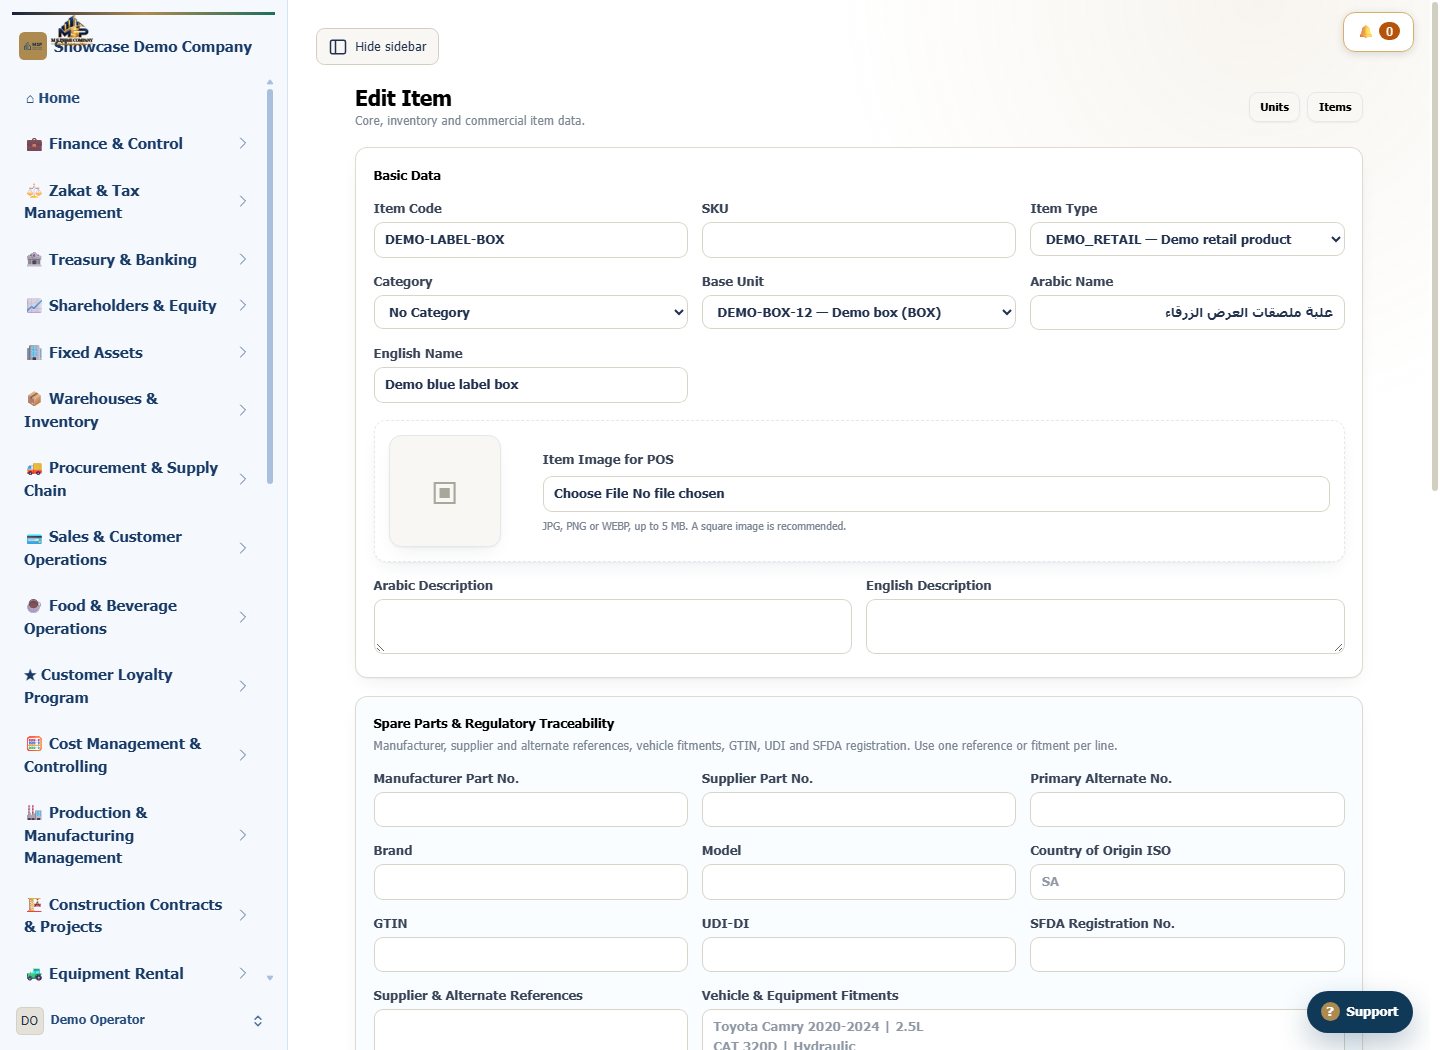
Go to Items and select New Item. Enter DEMO-LABEL-BOX and the item names, then select the item type.
Select the base unit and save
Choose DEMO-BOX-12 under Base Unit. Review the remaining required fields and save the item.
Confirm the unit assignment
Find the item by code, reopen it for editing and confirm that DEMO-BOX-12 is selected. The screenshot shows the item name after the change covered in the Audit Log guide.
What to check
Match the base unit to the quantity staff use. If you buy or sell in a different unit, review the conversion factor on the item record.