 MSP ERP
Step-by-step guide
How to trace an item creation and update in the audit log
The audit log shows the user, branch, time and action. Document History brings the recorded events for one record together in chronological order.
Before you start
This example uses DEMO-LABEL-BOX from the master data guide. We saved the item and then changed its name to Demo blue label box in the demo environment.
Steps to follow
Filter the activity log
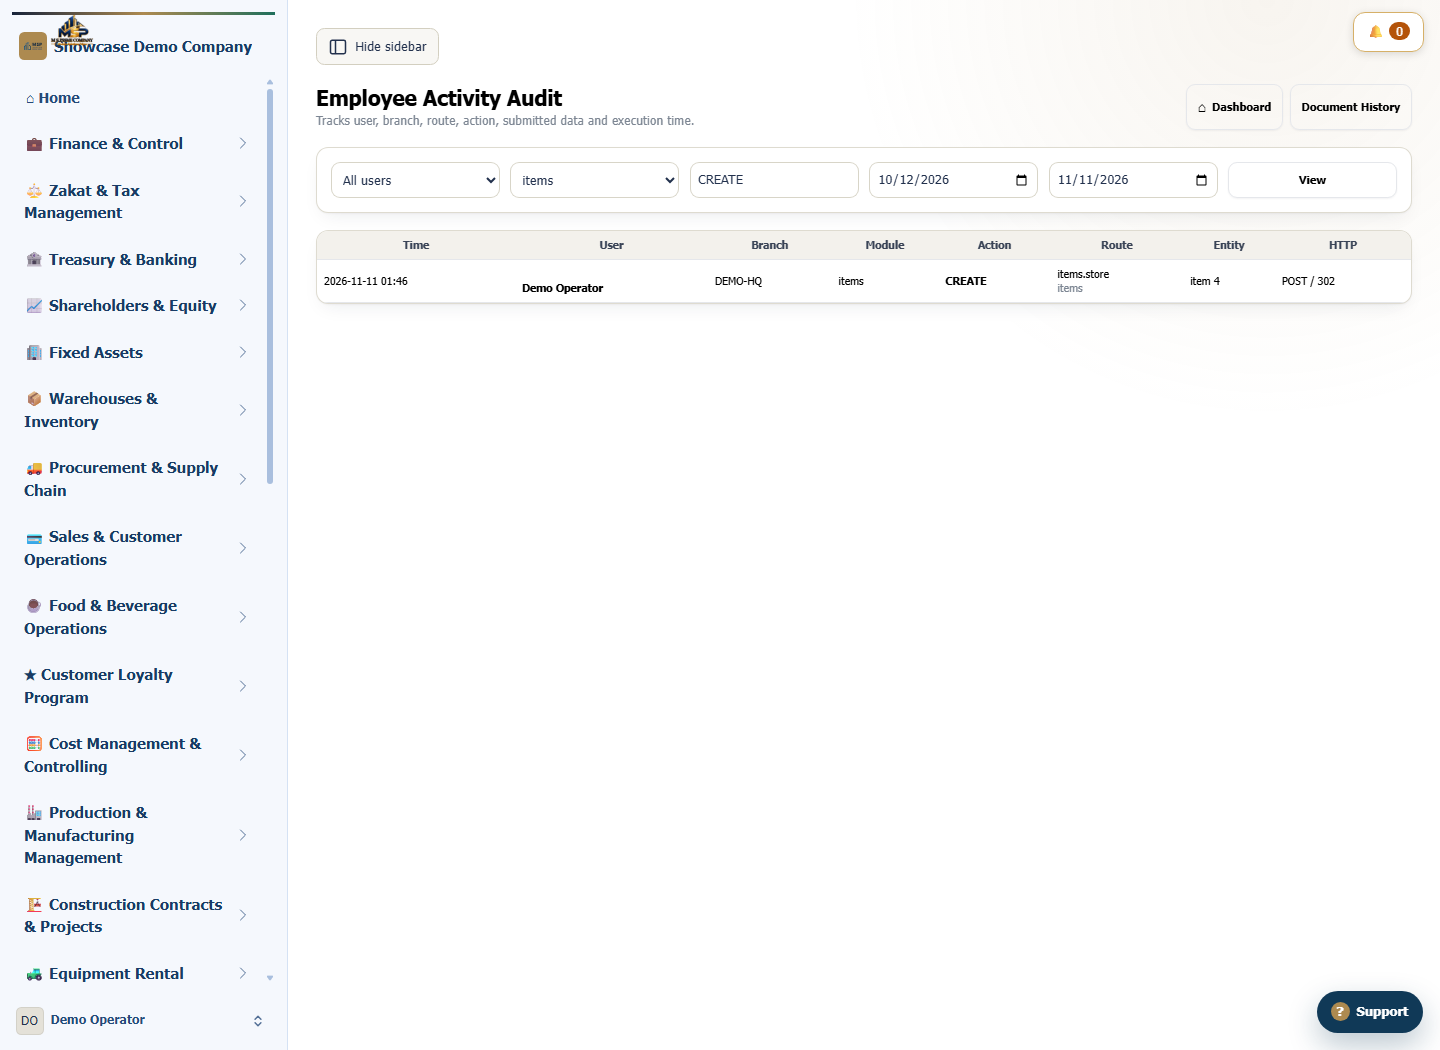
Open Audit Log. Select items as the module, enter CREATE for the action, set a date range that includes the creation date, and select View.
Match the creation event
Find the items.store route and check the user, branch and time. In the Entity column, record the number next to the type item.
Open the item history
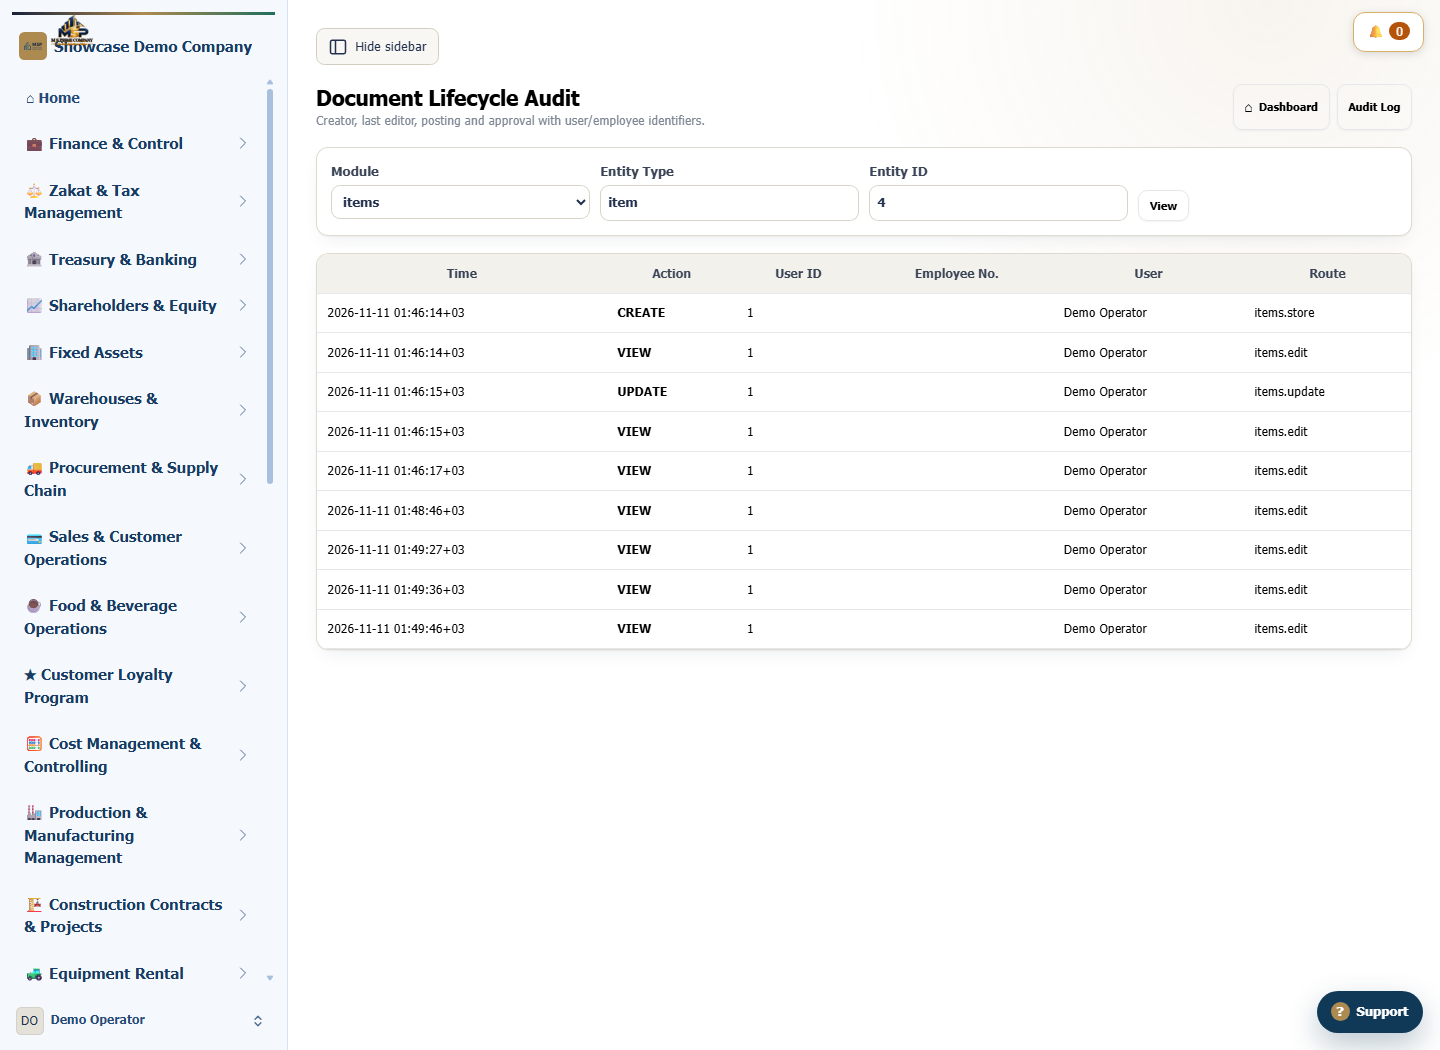
Select Document History. Choose items, enter item under Entity Type and enter the record number under Entity ID. Select View.
Review the event sequence
Match CREATE to items.store and UPDATE to items.update. Check the order, timestamps and user for each event. View events may appear between creation and update.
What to check
Use the entity type and internal ID to identify the record. Reopen the item itself if you need to verify the saved value after the update.