 MSP ERP
Step-by-step guide
How to filter a sales report and prepare it for printing
The sales report shows posted documents for the current branch. Summary totals for invoices, notes and amounts paid appear alongside the individual transactions.
Before you start
Use Demo Branch and the date of demo invoice DEMO-EINV-01. The selected day contains one posted invoice for SAR 230.
Steps to follow
Open the sales report
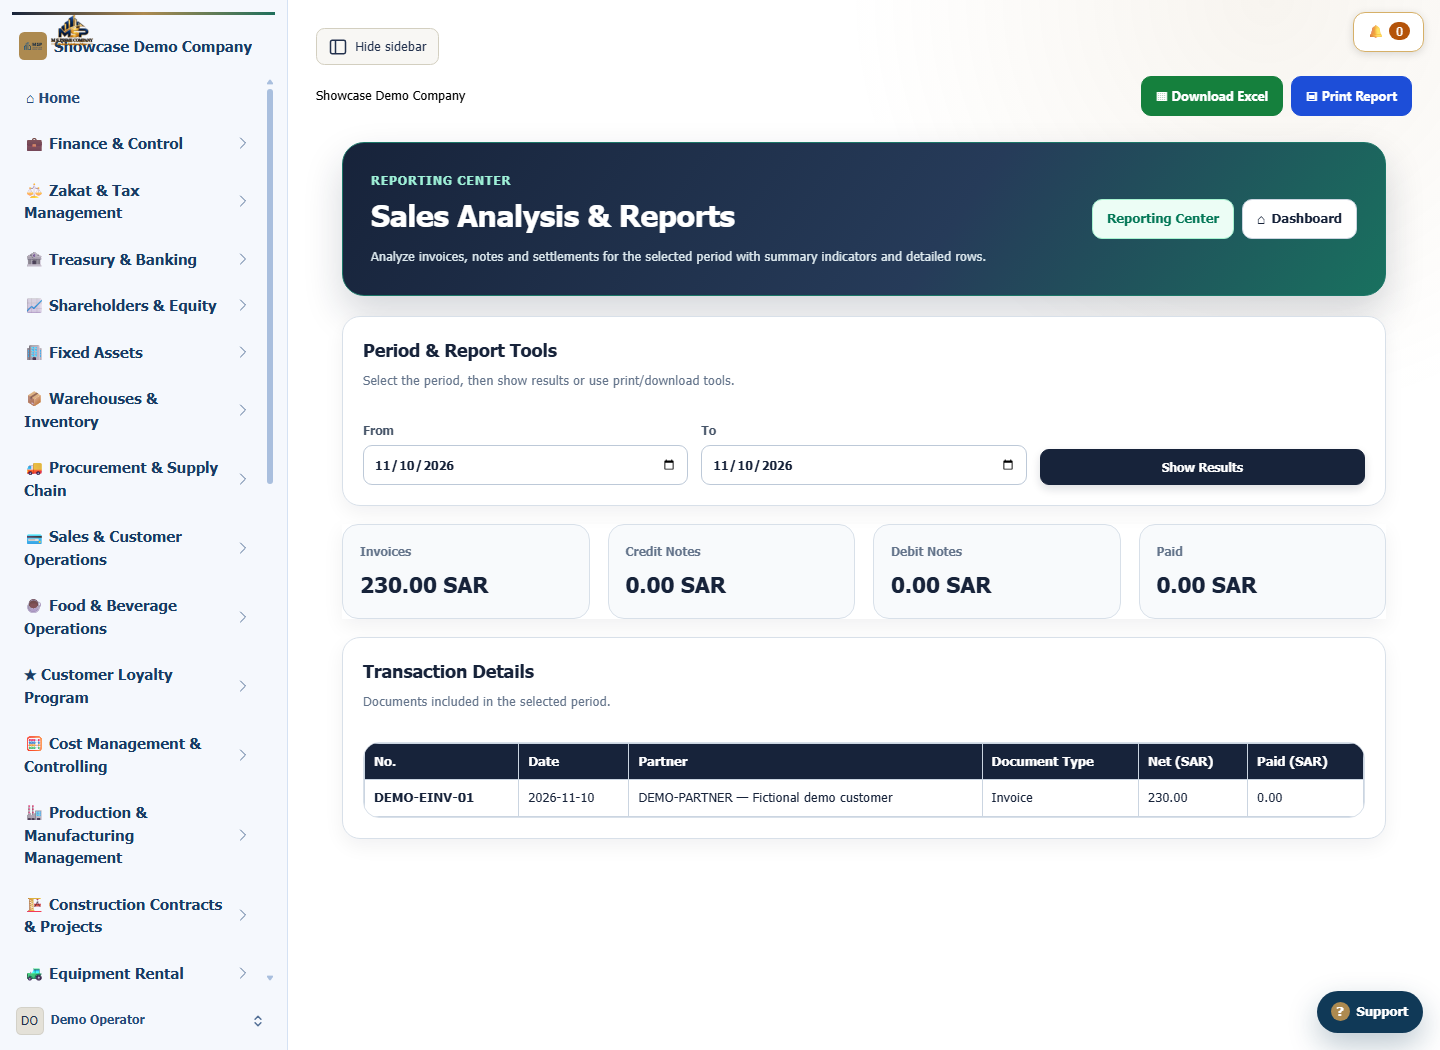
In Reporting Center, open Sales Analysis & Reports. Check the current branch before choosing the dates.
Set the dates and show results
Enter the demo invoice date in both From and To, then select Show Results.
Match the summary to the transaction
Review Invoices, then find DEMO-EINV-01 under Transaction Details. Match the invoice date and net amount to the example.
Prepare the print view
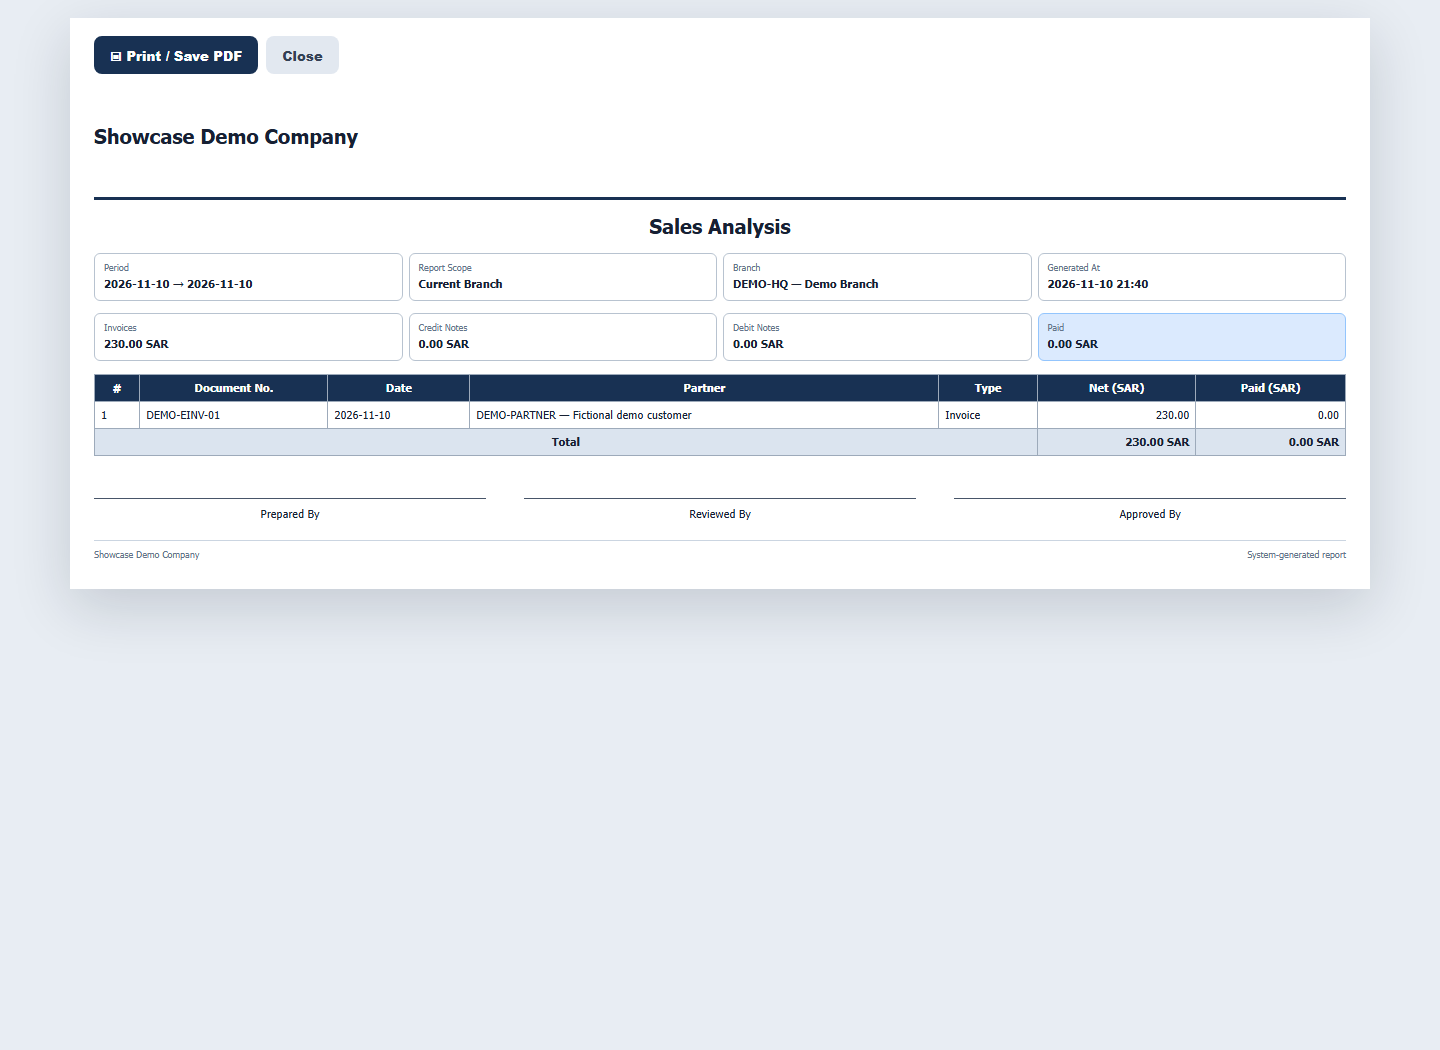
Select Print Report. Check the branch, dates and total in the print view, then use Print / Save PDF when needed.
What to check
The demo invoice shows SAR 230 in both the transaction table and the print view. Review credit and debit notes separately when comparing real results.