 MSP ERP
Step-by-step guide
How to prepare a POS sale and check the receipt
The retail screen brings items, quantities, payment method and total into one view. A cashier can review the sale before completing it and refer to the receipt later.
Before you start
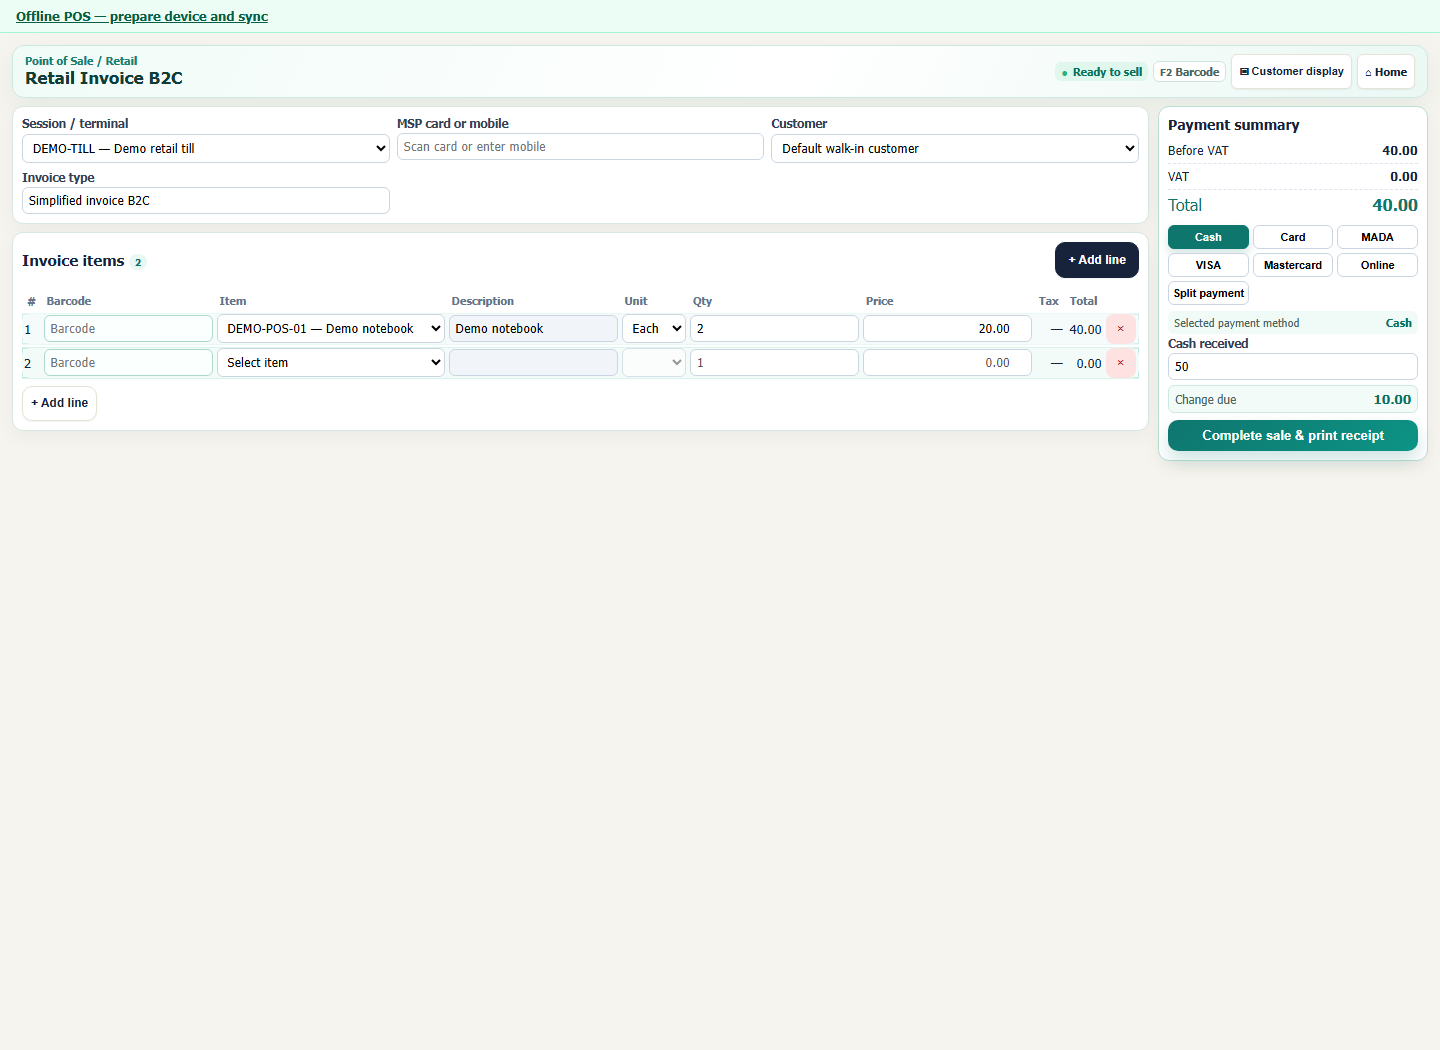
Use a demo branch with POS enabled, an open session and an item available in that branch. The screenshot shows a sample basket before completion.
Steps to follow
Select the POS session
Open retail checkout and verify the session for your branch and terminal before adding items.
Add the item and quantity
Enter the barcode and press Enter, or select the item from the list. In this example, choose Demo notebook and enter two units.
Review the payment summary
Match the price, quantity and total. The demo shows two notebooks at SAR 20 each, for a total of SAR 40. Entering SAR 50 as Cash received shows SAR 10 in change.
Complete the sale with an authorised account
After checking the details and receiving payment, the authorised cashier selects Complete sale & print receipt. Review the receipt number, items and payment method.
What to check
Before completing the sale, check the branch, session and payment method. If an item is missing, check its POS availability in the branch and the configured unit and price.